kumihimo
SOFT TOOLS / Crossing
Kumihimo means literally ‘joining threads together’ in Japanese. The technique gathers a wide variety of braids with lots of colors and patterns, named after the different tools – such as Taka-dai, Maru-dai and Kakku-dai – to create them. Kumihimo continues to build on a tradition that dates back more than 1400 years. The patterns used to be veiled in secret, and were only passed on verbally from master to pupil, guarded by the artisans. When the wear of kimonos – with the obi belt and the braided ribbon – declined during the 1970ies, many artisans had to close. To survive, the remaining ones unveiled their secrets to a broader public through teaching, workshops, and books.
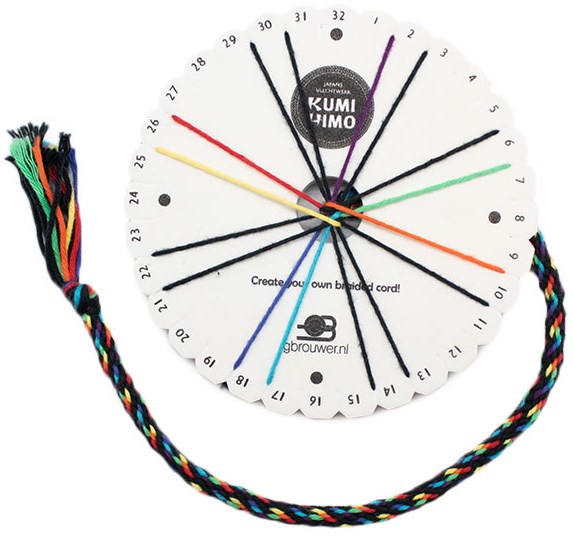
Soft Connection Lab opted to dive into the hobbyist version of kumihimo: the foam disk inspired by the Maru-dai or literally ‘round stand’, which allows you to make the same braids. As the Maru-dai is the most versatile of the different kumihimo tools, it allows you to make braids in round, square, rectangular, flat, triangular, and other polygonal shapes. Thanks to the slots on the side, which can hold the yarns, the set-up is a lot quicker. This facilitates experimentation.
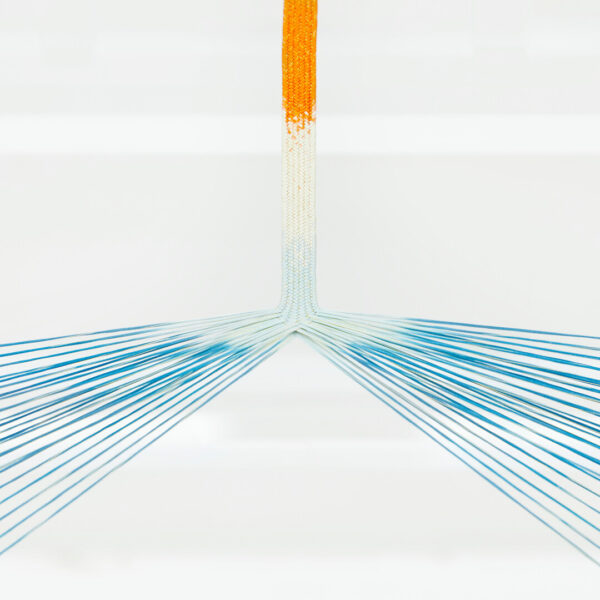
The research focuses on giving insight into kumihimo as a way of crossing yarns to obtain a textile. Designers and artists without any textile education should be able to understand the principles and be triggered to integrate these into their own discipline. This aim filters the choices for tools and techniques. Besides, Soft Connection Lab scaled up the hobby disk, so it can be operated by more people. The use of trackpads for the sequence of the crossing of the yarns allows the team to translate the small braids into table size and even human size walking braids, triggering creative minds.
Roots
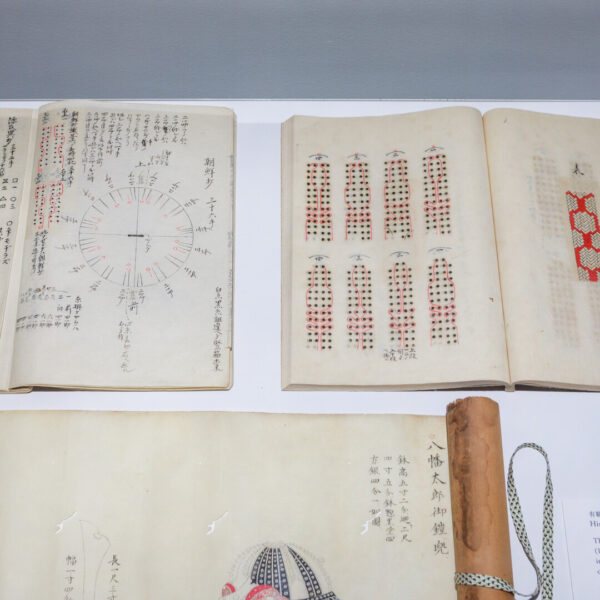

Inspired by techniques from the Asian continent, the braided silk cords evolved in Japan in complexity, color, and style. Initially they were used as decorative ties in the costumes and furnishings of the Imperial Court and as detailing for religious shrines and equipment in Buddhist temples. By the ninth century, braiding techniques became more elaborate and silk-dyeing techniques advanced, ushering in a golden age of kumihimo. Noblemen used the braided cords to hold the scabbards of their longswords and to tie handscrolls.
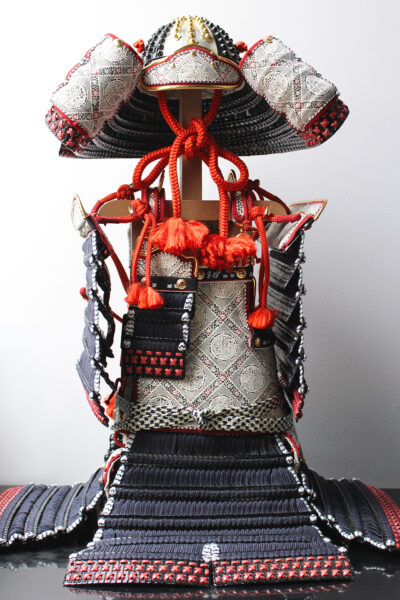
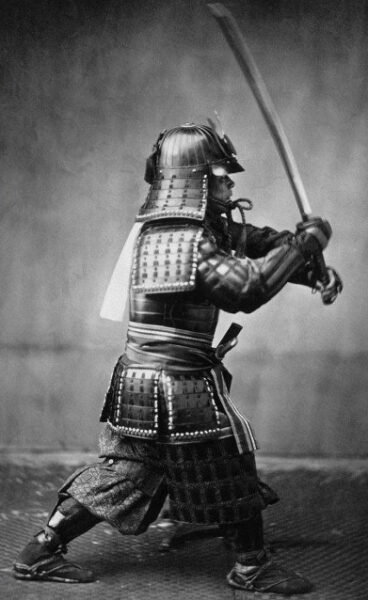
From around the tenth century kumihimo was also used by powerful warriors. New styles and techniques emerged to meet the needs of the emerging samurai class, from wrapping sword handles to tying together the lacquered metal plates of the armor. One suit contained 250-300 meters of kumihimo. By placing the cords in iced water, they became even more tightened and therefore resistant and protective. You could even tow a car with them.
After a short period of decline kumihimo flourished again during the Edo period (1603-1868) as a status symbol in the form of braids for carrying and wrapping the scabbards of swords. Moreover, the braids became prominent elements of the kimono ensembles worn by women of different social classes.
When a braiding machine was imported from the German town Barmen – nowadays called Wuppertal – around 1882, the industrialization entered in Japan. Machine made kumihimo was called ‘ironmade’ to mark the difference with the handmade braids, which were made on wooden tools. Due to the demand from the armed forces during the First World War, the braided goods industry boomed, and iron made cords were produced in large quantities. Around 1920, following a general trend for westernization, the naval school uniform made its entrance. Its line cords were ‘ironmade’ and mass-produced.
When the Japanese started to wear less kimonos in the 1970ies, the demand for the braids to tighten the obi or belt – or to suspend objects such as medicine containers and portable writing sets – declined. Meanwhile, also swords were forbidden. Many artisans had to close their workshops. Others survived because they unveiled the secrets of the craft to the public. While the craft was passed on orally before, they started to make tutorial books with pictures and sketches. Doing so, they opened the craft to amateurs. Although, some schools still prefer to keep their knowledge within a limited circle. Nowadays the braided silk cords are featured in both traditional and contemporary fashion, but as a principle also in engineering, architecture and even space technology. The kumihimo heritage motivated researchers to dive into the potential of innovative technological applications using carbon fibers to create ingenious braiding constructions.
Traditional Applications
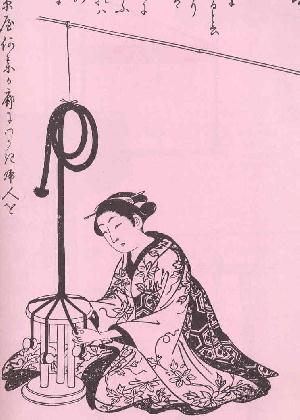
The earliest Kumihimo braids were ‘loop manipulated’ or worked with the threads looped over fingers. The braiding stands, which became immensely popular in Japan, were most probably developed in China or Korea. The first Japanese representations of a stand, more specifically the Taka-dai version, were only found during the late Edo period (1615-1867). Here we dive into the four most used Japanese manual braiding stands: Taka-dai, Ayatakedai, Maru-dai en Kaku-dai.
Originally these stands were developed to be worked on in a kneeling position. When the craft became accessible outside of Japan, western kumihimo makers invented some creative solutions to work in a more comfortable – often seated – position. Nowadays all kumihimo stands are available in different heights.
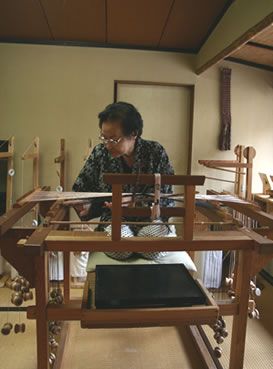
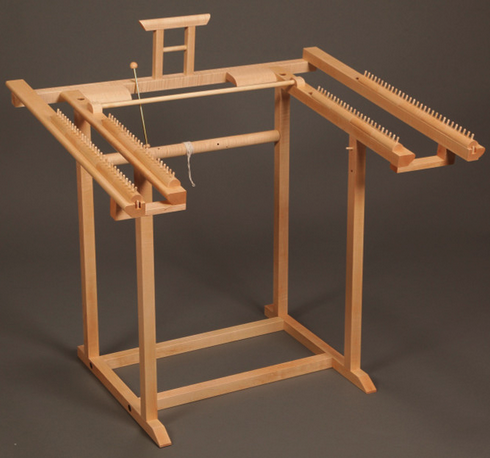
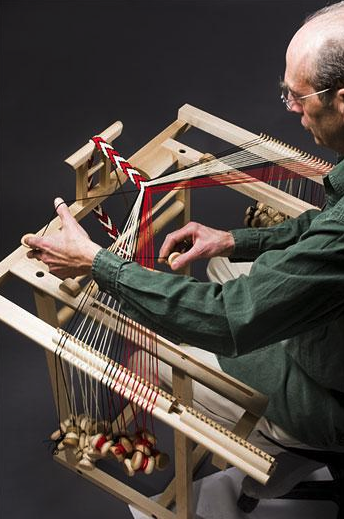
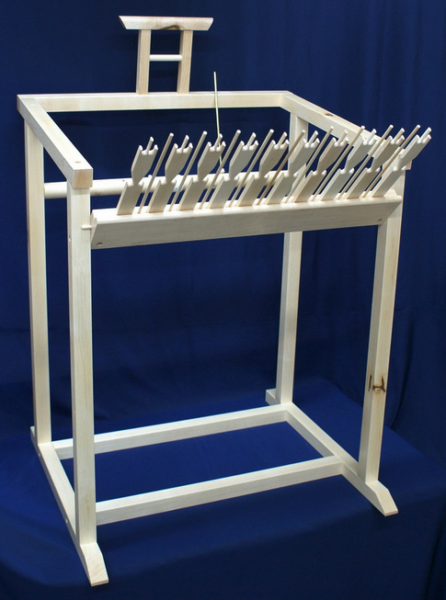
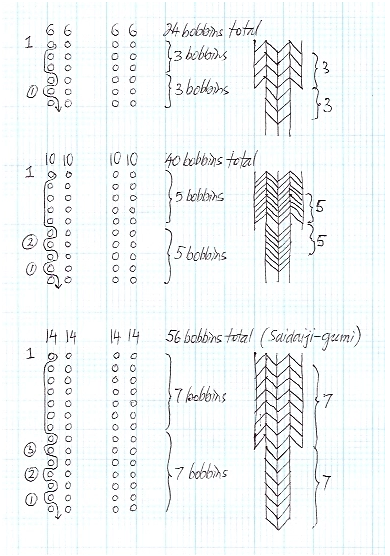
TAKA-DAI
The oldest one is a high stand, which is literally translated as Taka-dai (‘high’ ‘stand’). Another name for Taka-dai is ‘braiding on a loom’.
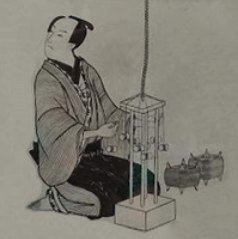
The artisan was kneeling on an elevated board to be able to work on this high stand. During the modernization and dissemination of the craft three different heights came to life, depending on the preferred working position – kneeling or sitting.
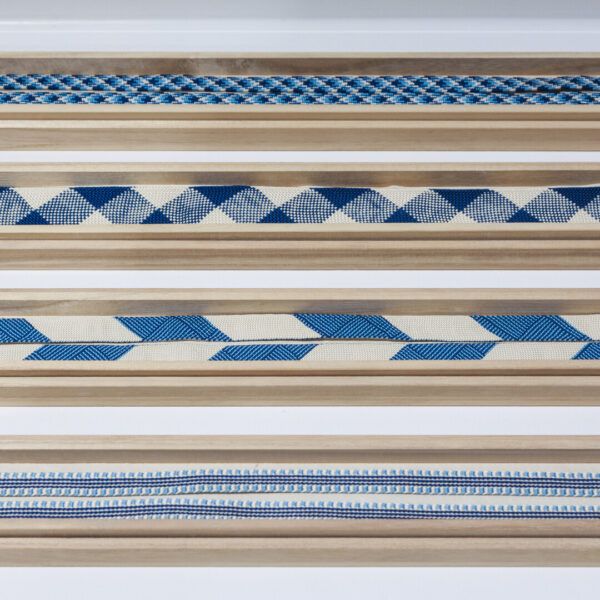
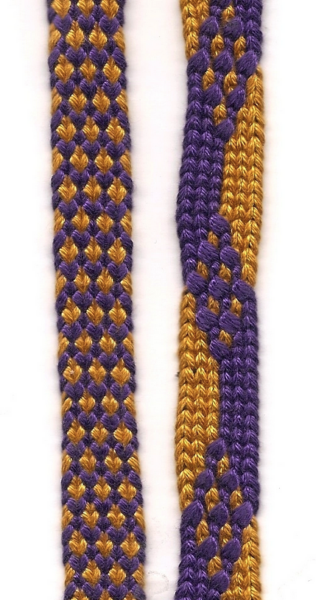
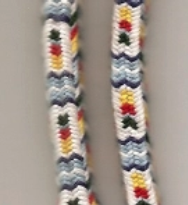
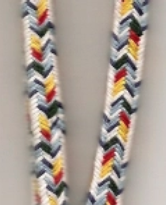
The braids are flat, can have intrinsic patterns and the construction is V-shaped.
AYATAKEDAI
As the name suggests, Ayatakedai is related to Taka-dai. It literally translates as ‘bamboo’ ‘high’ ‘stand’. It also comes in different heights nowadays, but the use of this stand is less widespread than the first one with the shorter name.
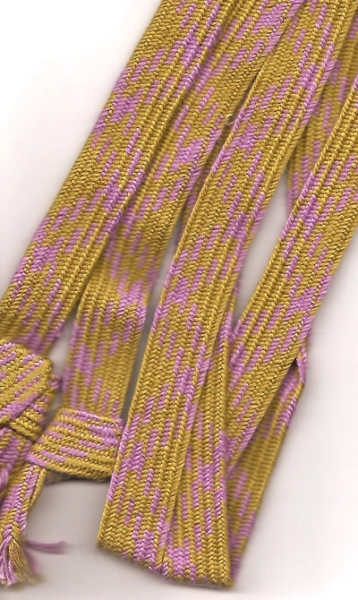
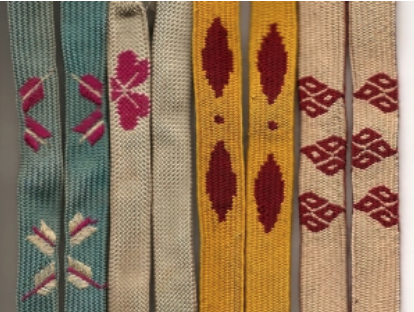
Ayatakedai creates flat braids, which can be compared to ribbons woven by tablet or card weaving. The thread bundles that are kept tightly twisted, rather than lying flat, reflect light in a different way.
KAKKU-DAI
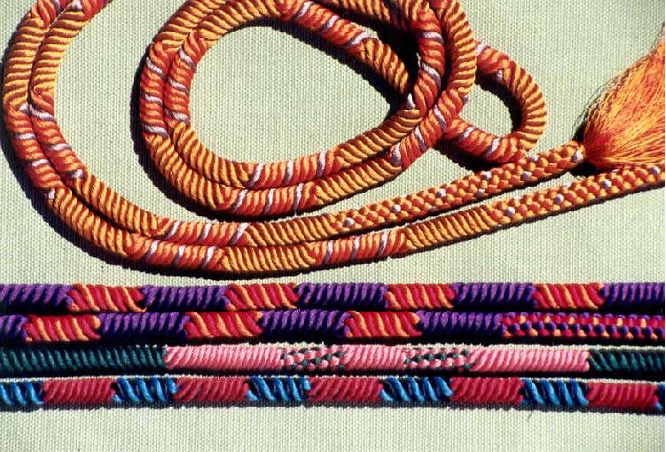
Kakku-dai literally means ‘square’ ‘stand’. While working, the braid is pulled upwards by a weighted pulley. As each bundle of threads is twisted, this results in a tight braid with round edges. The produced braids can be square, round or oval. As there’s little demand for this device, it seems like the tool is not offered in various heights.
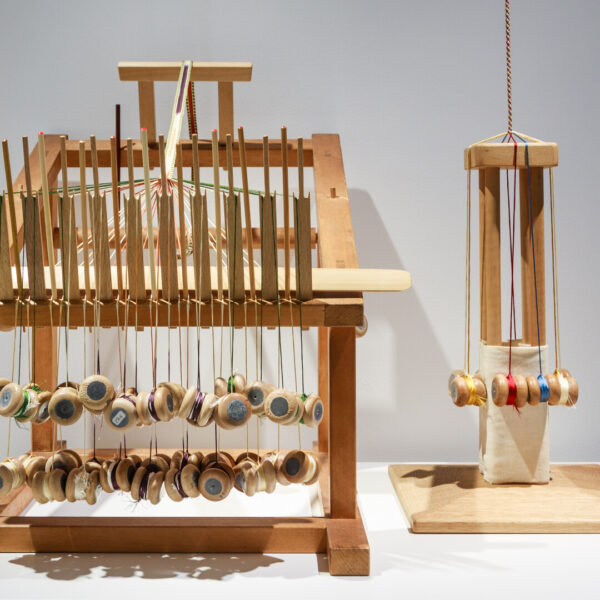
MARU-DAI
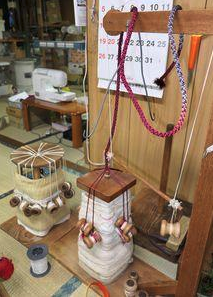
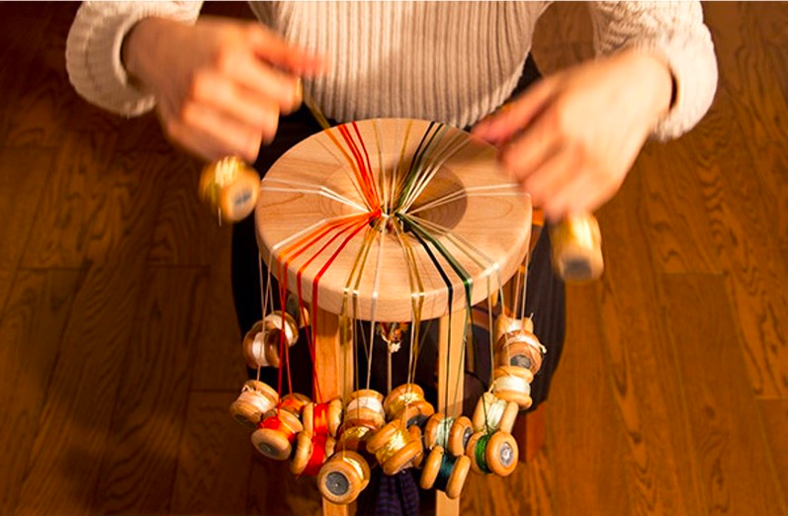
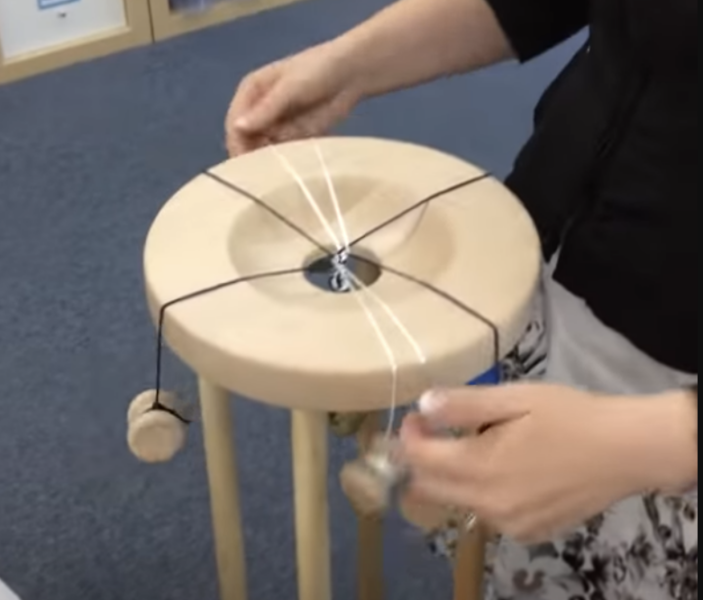
The Maru-dai or ‘round’ ‘stand’ – a large, wooden circle on four legs with an opening in the center – is the most versatile of the four basic types of kumihimo tools, and thus it became the most popular one. The Maru-dai makes it possible to create an endless variety of patterns and even shapes: round, square, rectangular, flat, triangular, or other polygonal shapes. The braid is made downwards through the center hole.
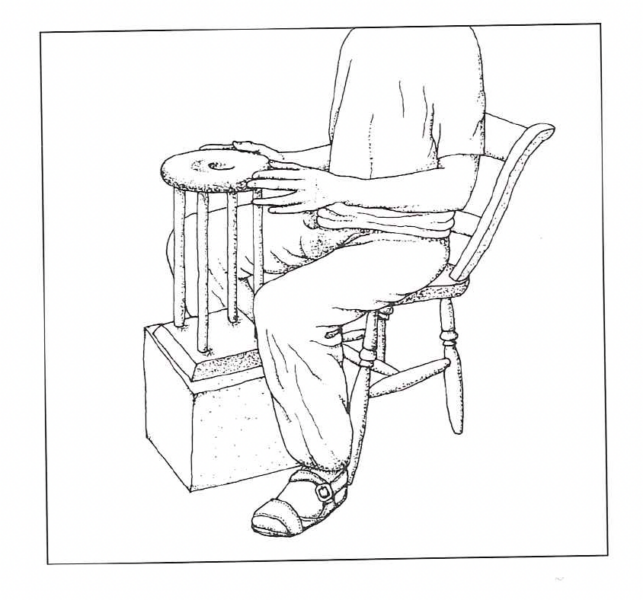
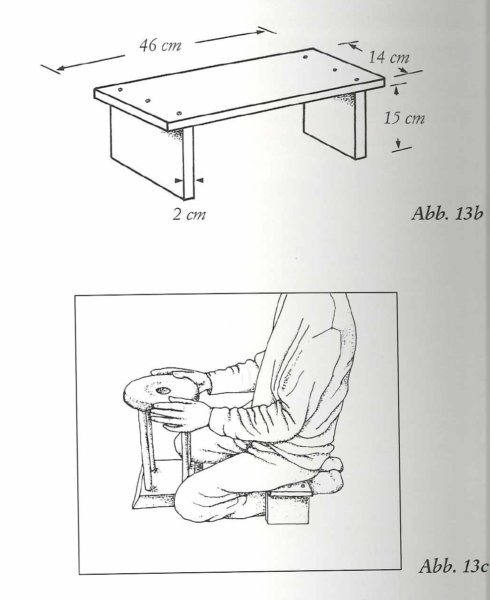
The traditional or Japanese-style Maru-dai is 40-50 cm tall and is designed to be used in a kneeling position on tatami mats. In the early days of western use, the tool was creatively adapted for a chair-sitting position. Nowadays, versions to sit, kneel or stand are available.
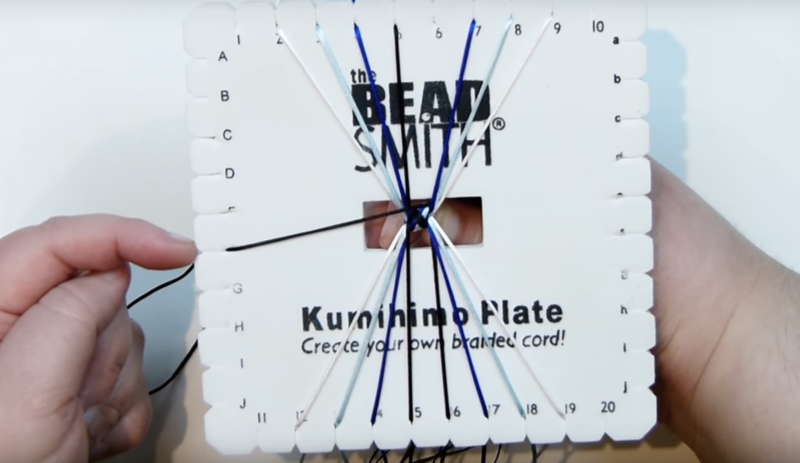
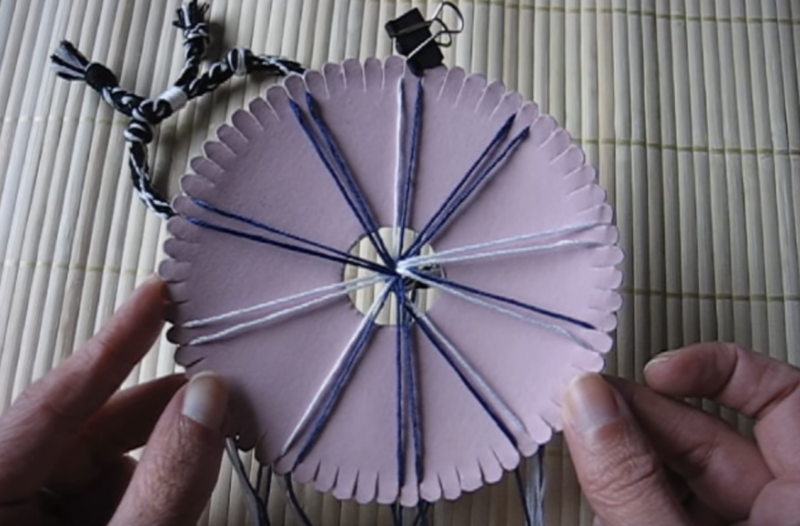
The wooden bobbins on the traditional dai, used as a weight and to wind the yarn lenghts, create a beautiful rhythmic noise during the braiding. The more generalized, highly available western versions simply consist out of a round disk. In this version, the ropes are clamped directly into the disk, which allows a quicker set-up. Nevertheless, the traditional wooden stands allows to braid two times faster than the foam disk, once it’s set up.
In the Watch & learn-section of our website, you can watch a video which shows the difference in speed for both movements.
This video shows the ingenuity and the elegance of the craft, but also it’s complexity.
Watch & Learn
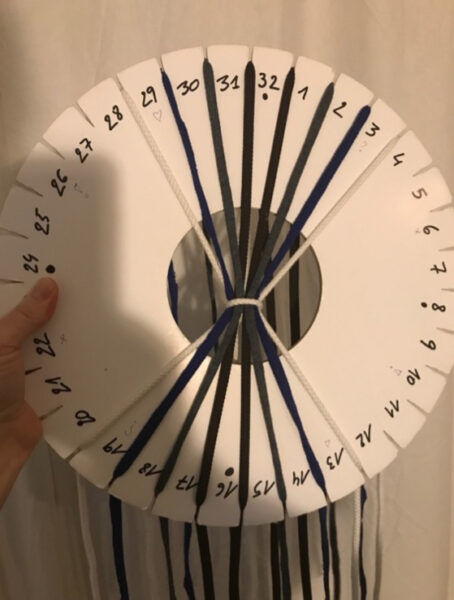
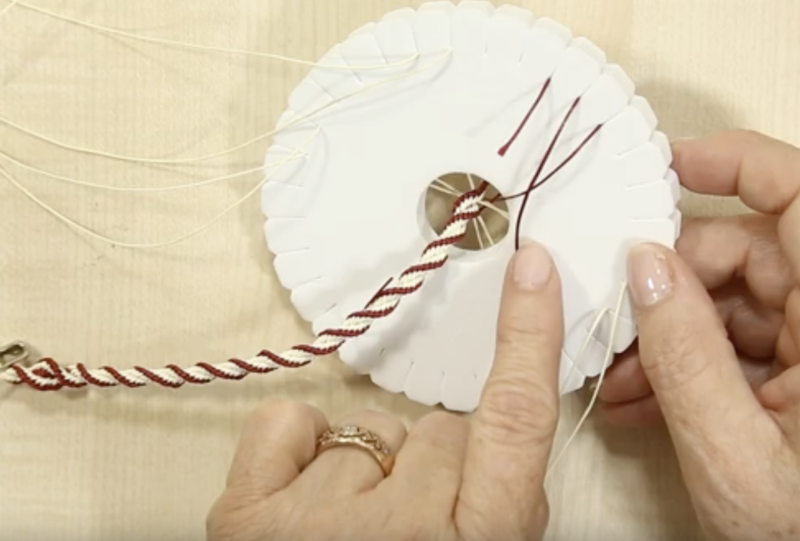
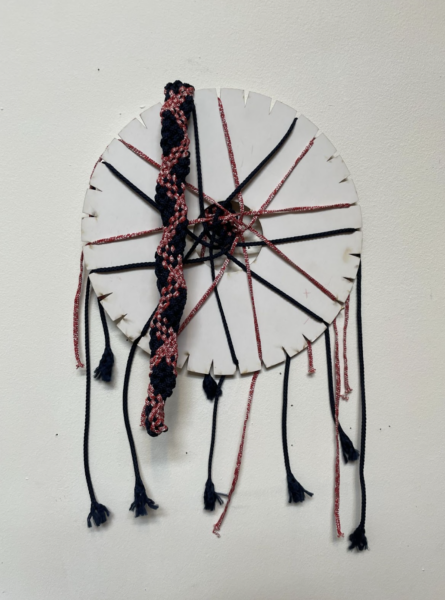
At Soft Connection Lab, we focus on the westernized version of the most versatile kumihimo tool: the foam hobbyist disk, which is derived from the Maru-dai. The following film fragment clearly shows the difference in the hand moves between the wooden tool and the foam disk: for four moves on the wooden stand, you need eight moves on the foam disk.
The good thing about the hobbyist version is that it made kumihimo broadly available. The disadvantage is that the technique is mostly associated with the creation of bracelets today. This application is just a reduced fragment of the possibilities, both in terms of time, investment, patience, and training. Soft Connection Lab aims to broaden the scale, applications, and insights of this ingenious craft
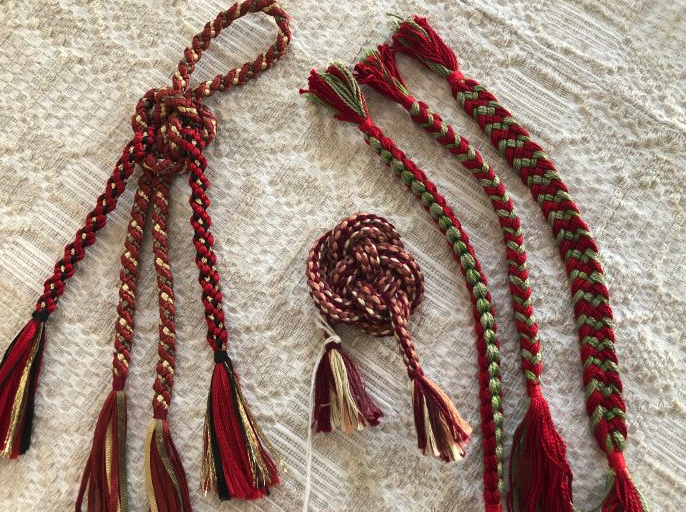
We share a selection of Youtube tutorials and diagrams about three different types of closed braids: the round, spiral and square/octagonal braid. As the yarns cross over the central opening of the disk, a closed or full braid is created using all three techniques. Besides we demonstrate how to make a hollow braid, where the yarns cross on the sides of the disk, creating an open structure.
Lastly, it’s possible to make flat braids on a round disk, with again a vast variation on patterns and constructions. Although we decided not to focus on these flat braids within the framework of our research, we briefly introduce them.
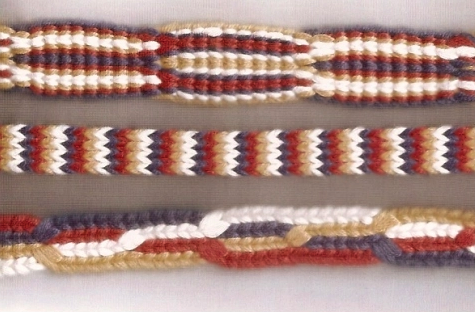
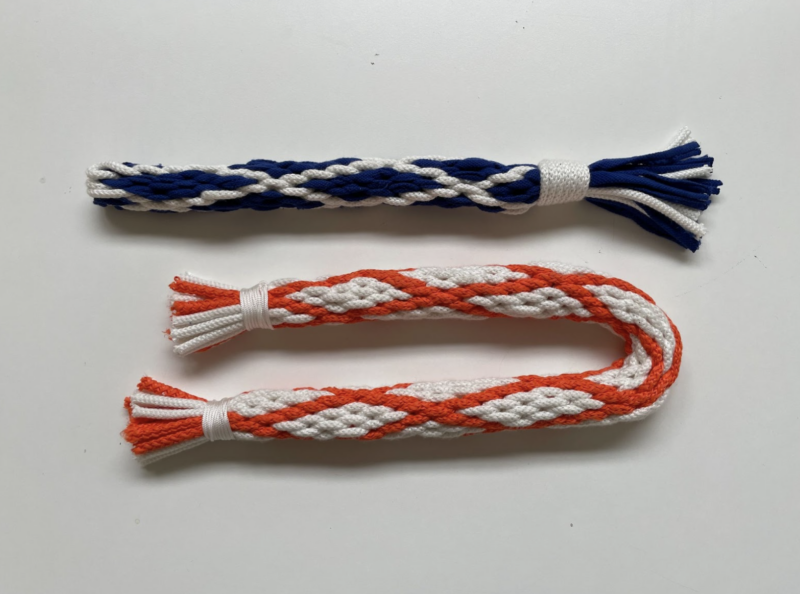
Basic round braids
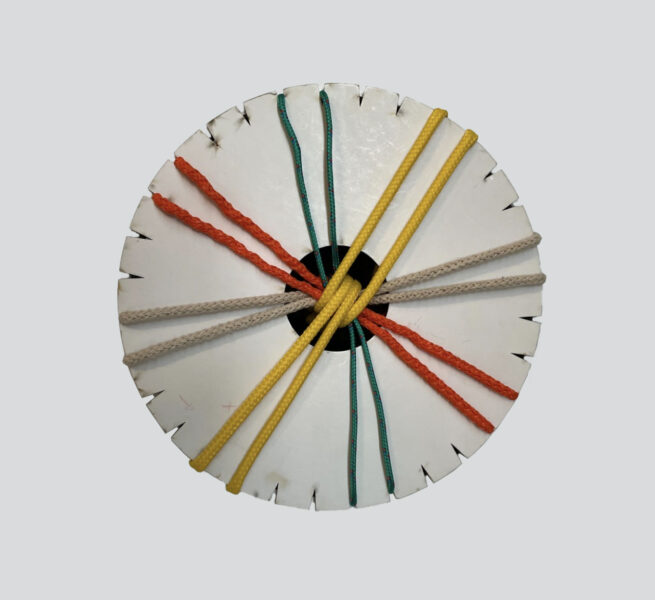
The round shape is the most common one. It can be made with a minimum of four pairs of yarns, up to a maximum depending on the number of slots on the disk.
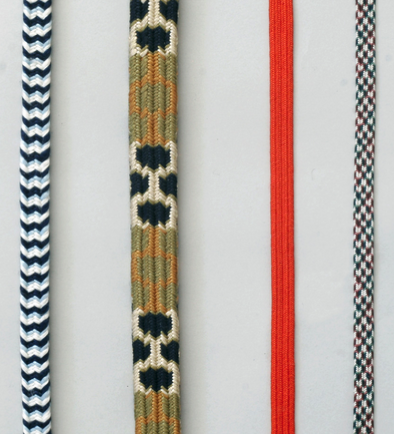
Although this basic sequence is very simple, it offers the possibility to obtain a vast variety of patterns. You just need to change the colors of the set-up.
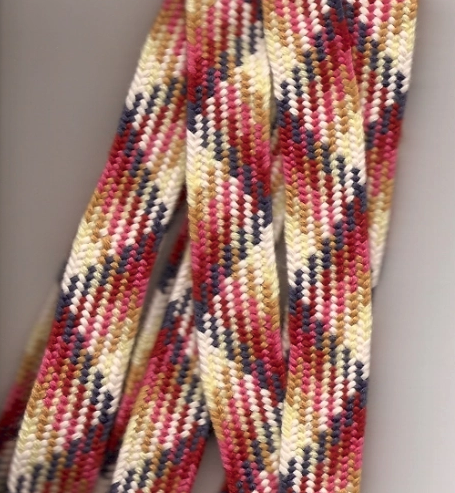
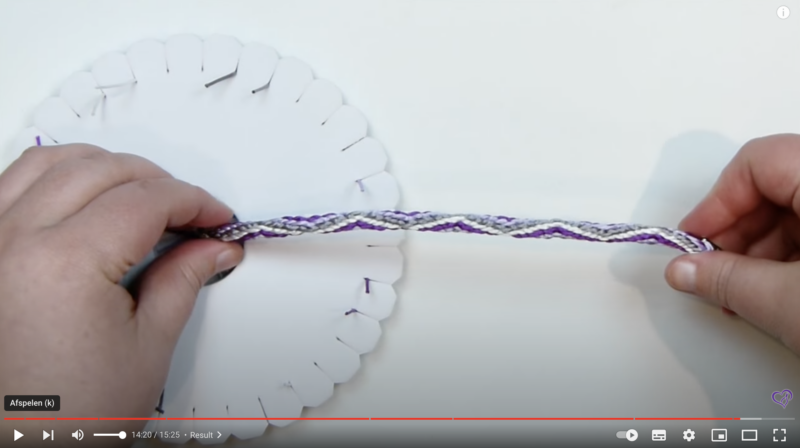
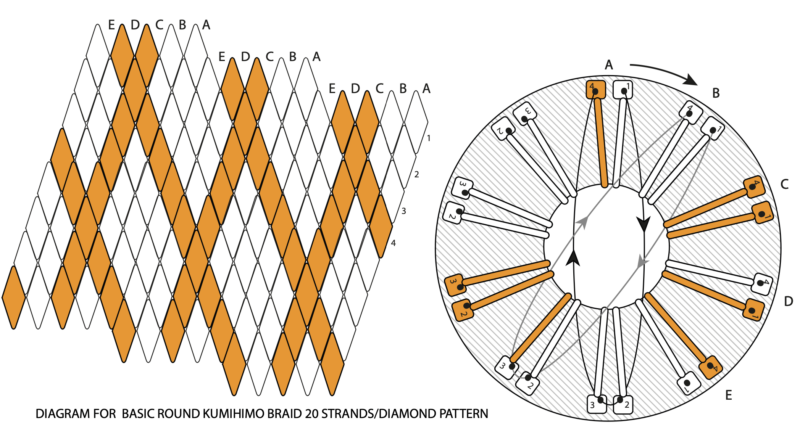
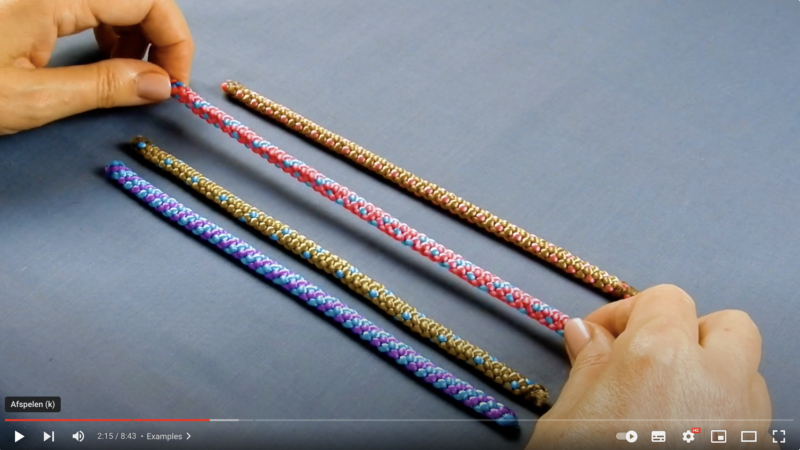
The videos which you can follow next to the text are a selection of tutorials for a simple striped braid – a zig-zag pattern, where you need to inverse the crossing movement, and a lovely diamond patterned braid.
The diagrams that accompany every video illustrate the above-mentioned braids. If you want, you can download our diagrams for manual coloring here:
Basic round kumihimo 16 strands
Basic round kumihimo 16 strands
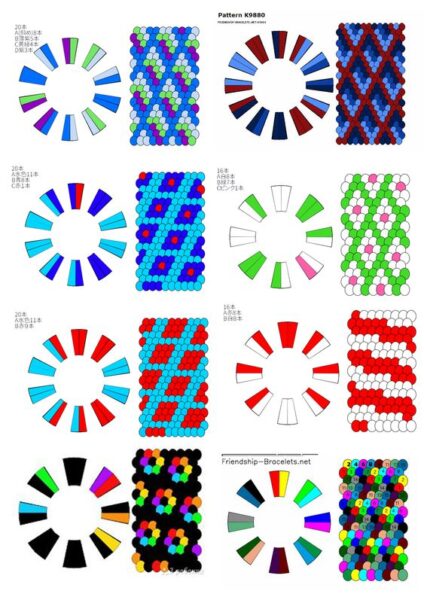
Several online platforms offer the possibility to download patterns and to digitally generate your own patterns or adapt existing patterns:
Crafts Design Online
Friendship Bracelets
Fene4ki


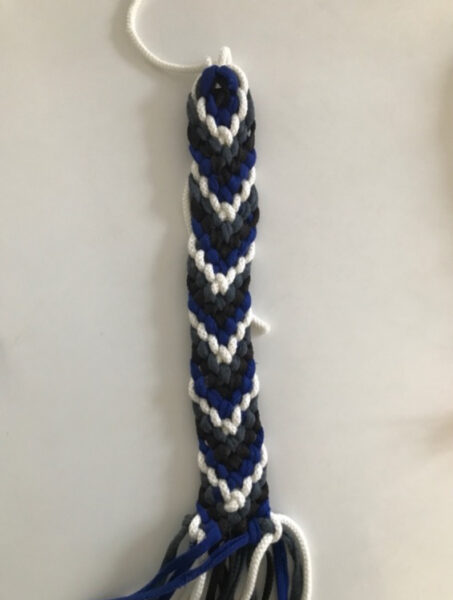
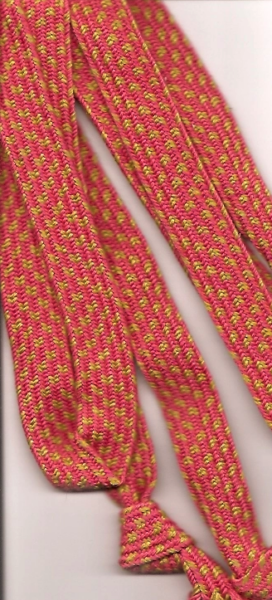
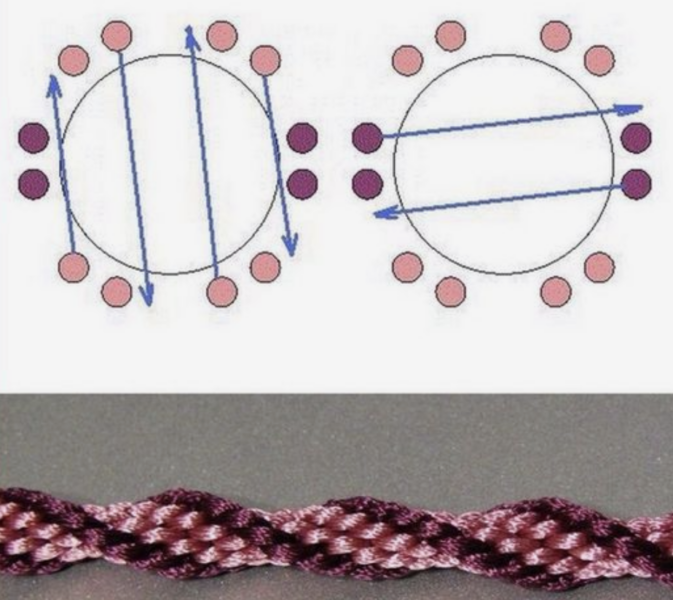
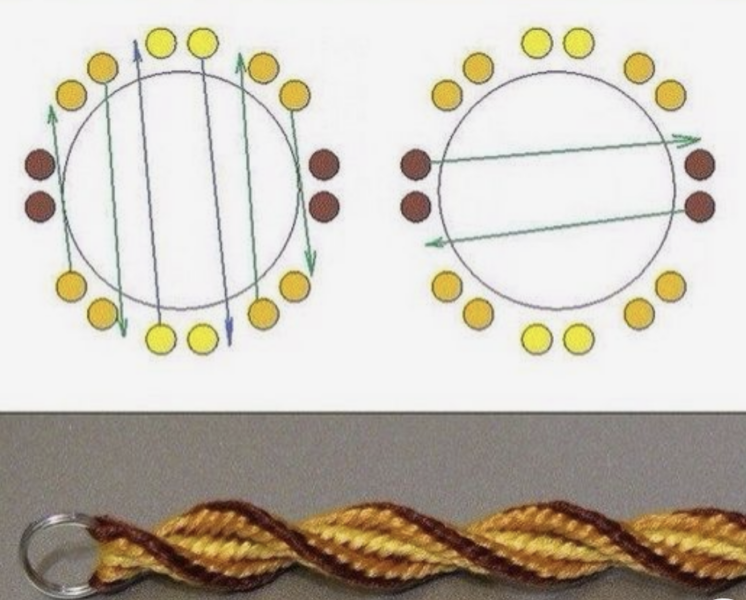
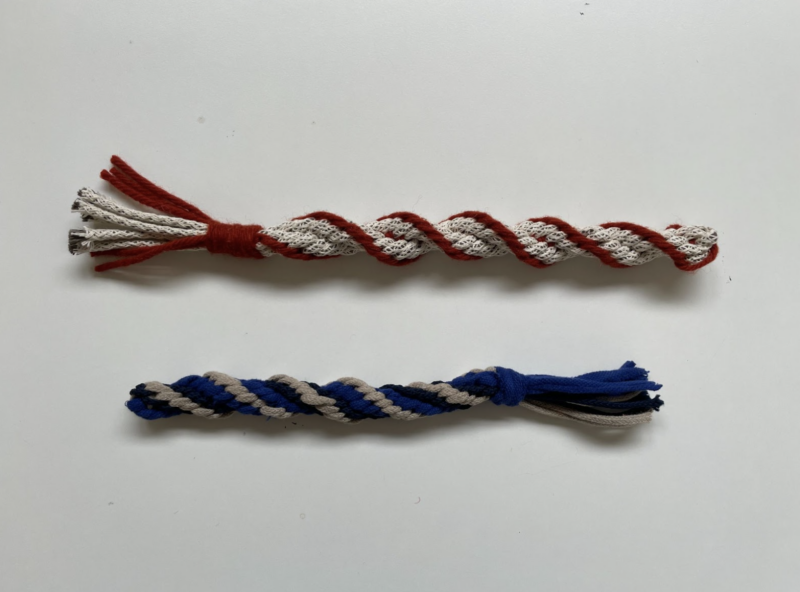
Spiral braids
This pattern asks for a slight variation in the sequence, which creates a difference in the structure of the braid, resulting in a pronounced spiraling structure. The braid is made by combining crossing in the middle and crossing on the sides, as shown on the tutorial. The diagrams show that you can vary the number of strands, still obtaining the spiral structure.
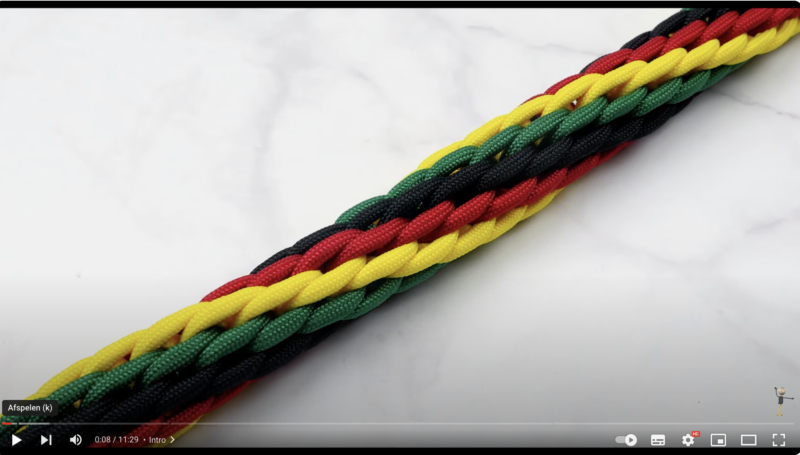
Square and octagonal braids
For square and octagonal braids, the strands need to be worked in pairs, with each element of the pair being crossed in a mirrored movement. A square braid is worked with eight strands; an octagonal braid with sixteen strands. The shape is defined by the number of strands.
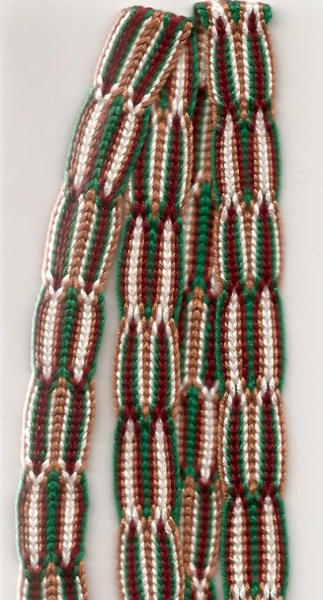
Hollow braids
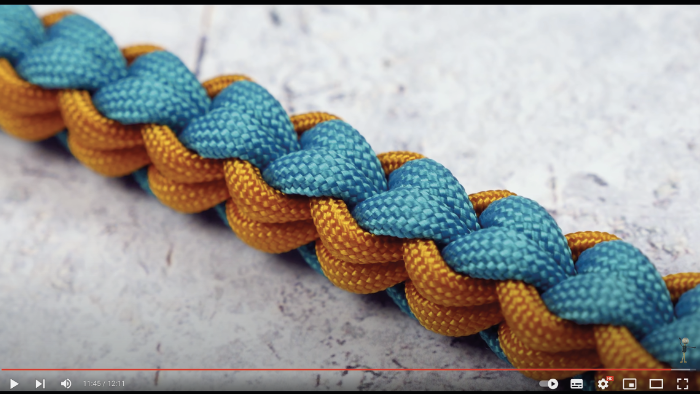
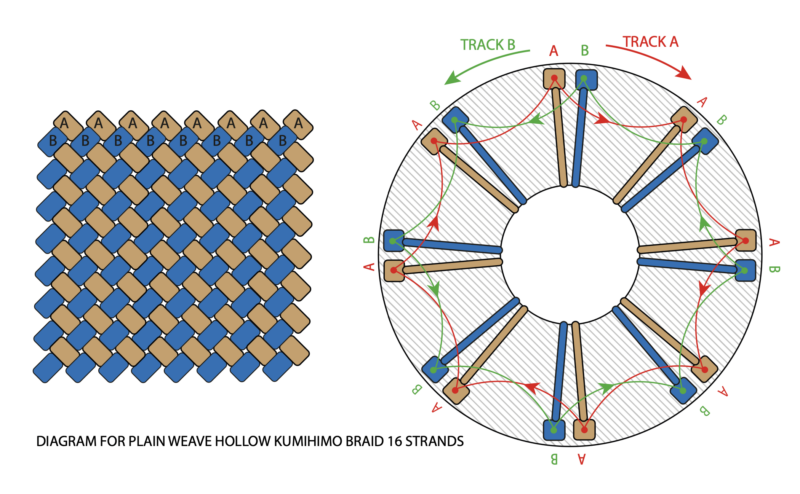
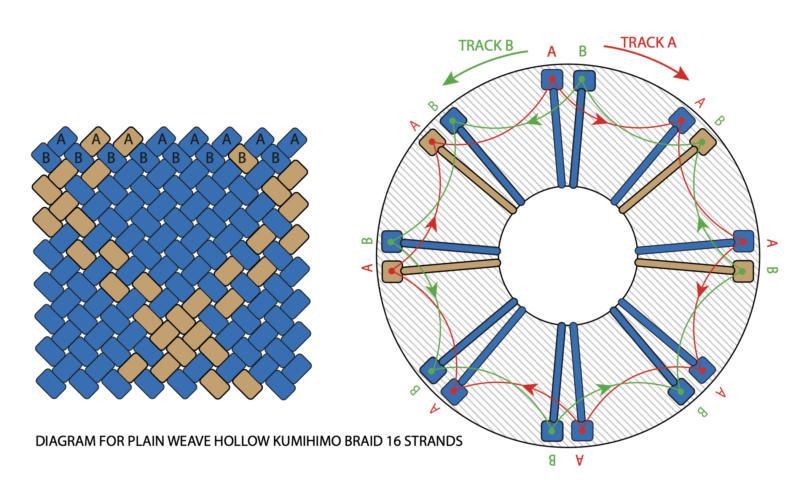
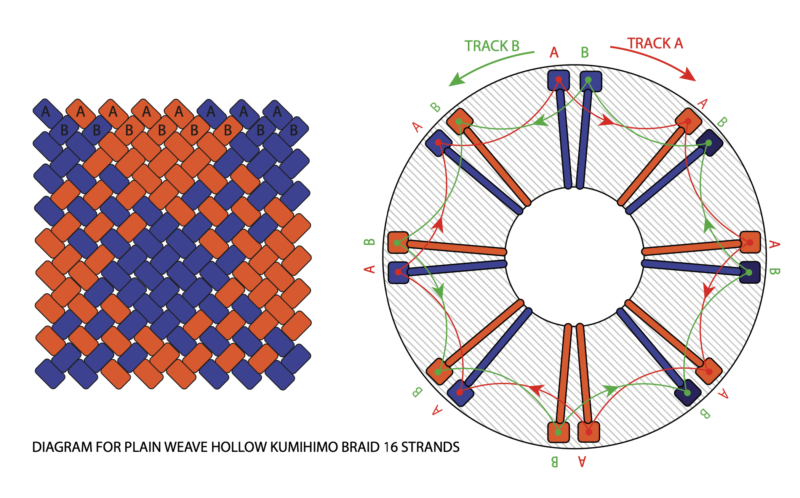
The construction of the hollow kumihimo braid differs from the other types of kumihimo, because the crossing of the yarns is done on the side of the disk, and not in the center. This way of crossing creates a hollow structure and looks like a diagonal plain weave.
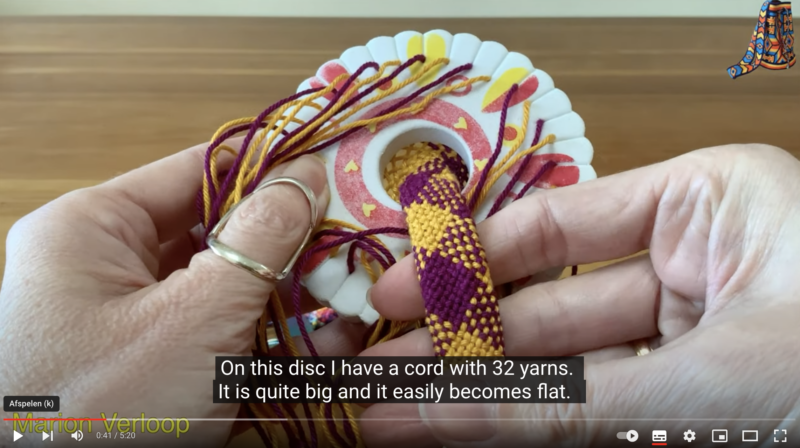
As for the basic round braid, hollow braids allow you to make a vast variety of patterns. We selected different Youtube tutorials: one shows a round braid with eight strands, the other is a tutorial for 32 strands. They both show a slightly different approach. We advise to start with the tutorial with eight strands. Then try a hollow braid with sixteen strands, before tackling the 32 strands version.
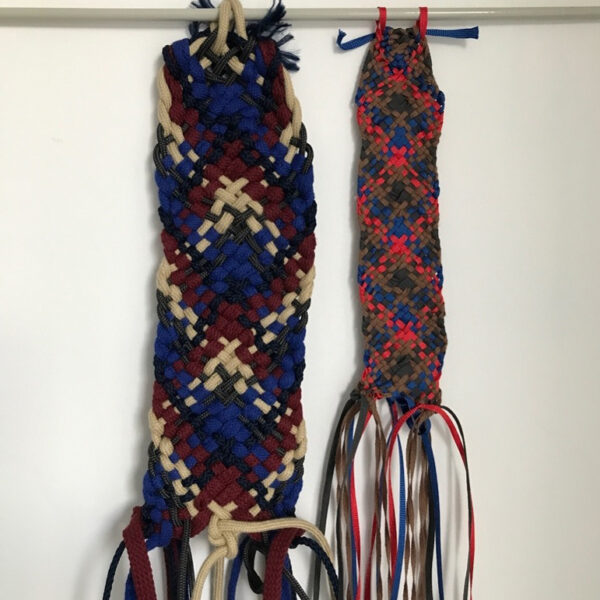
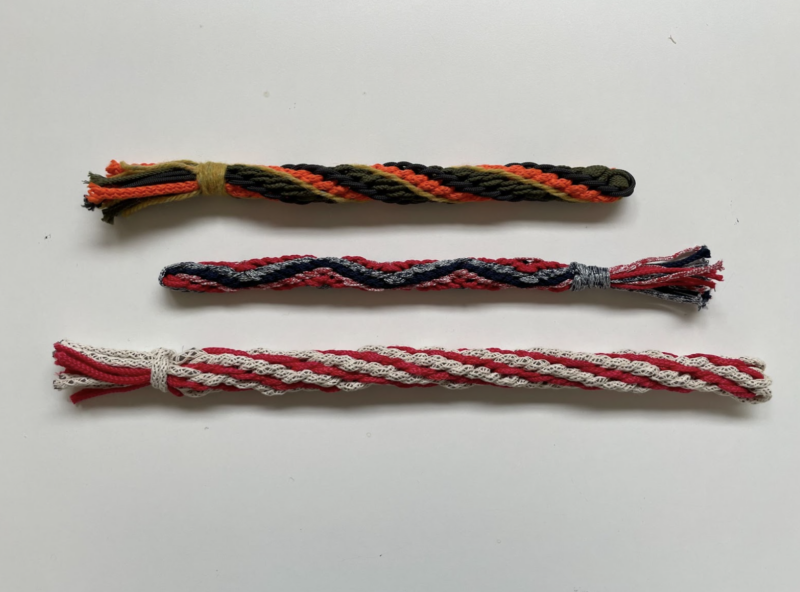
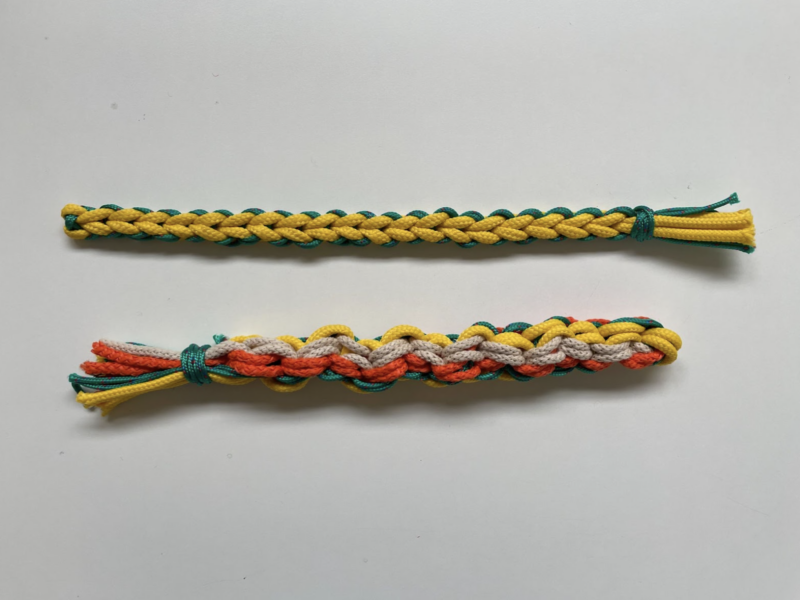
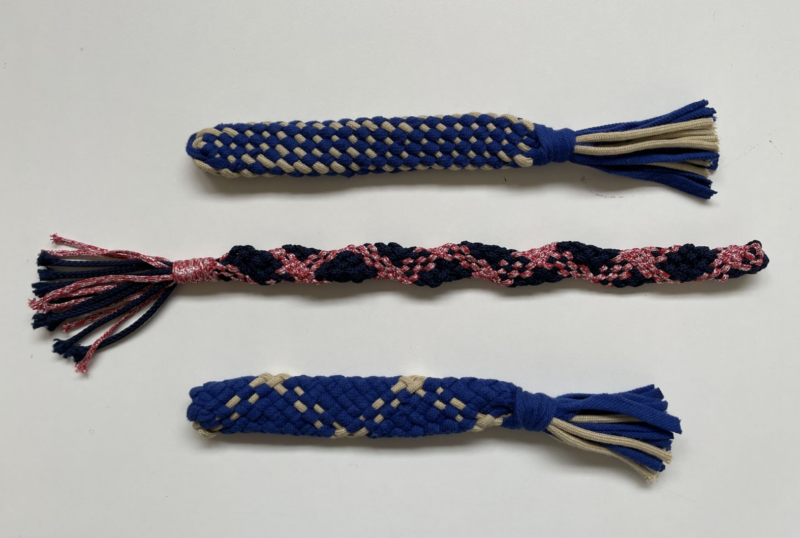
Our self-developed diagrams illustrate samples of the hollow braids in the picture. If you want, you can download our diagram for manual coloring here:
Hollow braid 16 strands
The Craft Design Online platform offers the possibility to download patters for plain weave hollow braids, or to digitally generate your own pattern or adapt existing patterns.
Flat braids
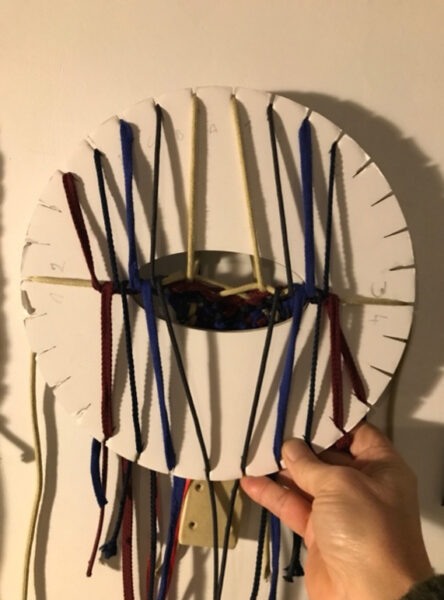
In general, flat braids are made on the Taka-dai stand. But it’s also possible to make them on a foam hobbyist disk. Most tutorials show a rectangular disk, but a round disk is also possible. The most important is that the opening in the center is wide enough for the type of flat braid you want to create.
Flat braids come in a wide variety of patterns and constructions. We noticed that wider braids, with around twenty strands, require quite some exercise and dexterity to obtain a smooth and regular tension. If you want to start experimenting with flat braids, it’s best to start with fewer strands and make sure you keep an even amount of tension on all strands.
In the frame of this research project, we’ve decided to not dive deeper into flat braids. But we gladly share some tutorials (look for ‘flat kumihimo braid’) with a rectangular hobbyist foam disk.